Try starting to make your own Halloween mask at home. It’s a simple and rewarding project, so explore something new while preparing your DIY mask. With just a few materials and the right strategy, you can create Scary Halloween Masks that stand out. Design your mask however you like. This project becomes an enjoyable advanced crafting experience. You’ll need basic items like paper, markers, scissors, and elastic.
Whether your style is horrific, entertaining, or funny, creating your mask allows you to personalize your Halloween outfit. From cutting the fabric to adding the finishing touches, this detailed guide will take you through the entire process. Now let’s get your homemade mask made!
1. Cut the Fabric:
While making a DIY Halloween mask the very first step is to cut the fabric and make sure it is comfortable and fits your Halloween theme. Start by measuring and drawing the shape of your mask on the fabric. You can use a template or freehand your design.
While designing a mask make sure your cool Halloween masks cover your face adequately, including the nose and mouth, and extend to where you want it to sit on your face. After completing the procedure of shaping your mask, then carefully cut out the mask using scissors. If you want a doubled layer mask then cut two pieces of the same shape.
2. Layer the Fabric:
The next step after cutting out the shape of your Halloween mask from your chosen design is to layer the fabric. The cutout mask shape lay on a flat surface with the front side facing down.
Now’s time to align the extra fabric pieces if you’re utilizing a double-layer design or adding extra features like a filter pocket. Make sure they line up precisely by placing them on top of the base mask shape with their right sides facing inward. To hold the layers in place while stitching or gluing, pin or clip them together at the edges. Layering the fabric sets the foundation for adding details and ensuring your mask is sturdy and comfortable.
3. Sew the Edges:
After completing the step of the layer of the fabric, sew the edges in the next step. By using a needle and thread or a sewing machine, you can sew the edges of the mask. Begin at one side and sew all around, leaving a small opening at the bottom or side if you plan to turn the mask inside out layer.
The stitches help the layer together and prepare the mask for shaping and finishing touch. Make sure to sew close to the edge to keep the layers aligned and secure. Sewing the edges ensures that your DIY Halloween mask is durable and ready for the next steps in customization.
In addition to holding the layer together, the stitches get the mask ready for shaping and final touches. For the layers to remain stable and aligned, be sure to stitch close to the edge. Your DIY Halloween mask will be sturdy and prepared for further personalization if the edges are sewn.
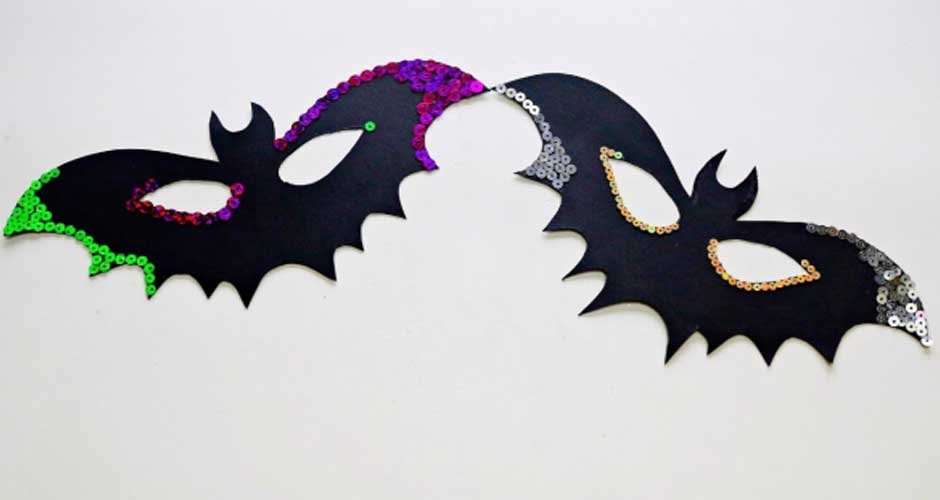
Image Alt: #Scary HalloweenMasks
4. Create Pleats:
Create pleats to help the mask fit snugly over your face and add dimension to the fabric. To create pleats, pinch the fabric at regular intervals along the sides of the mask. To create the style according to you, fold each pleat bring the fabric together, and secure it with pins or clips.
Make sure the pleats are evenly spaced and adjust them until you’re satisfied with the fit. Once pleated, sew along the sides of the mask again to secure the pleats in place. Creating pleats gives your DIY Halloween mask a professional finish and ensures comfort when worn.
5. Attach the Elastic:
When the step of creating pleats, the next step is to attach the elastic. It helps keep the mask securely in place over your face. Cut two pieces of elastic, each about 6 inches long. At the corner of the mask pin or clip at one end of each elastic piece to the corners of the mask, where the sides meet the top and bottom edges.
Sew the elastic securely to the mask by stitching it back and forth a few times. Ensure the elastic is taut but not too tight, allowing the mask to fit comfortably over your ears or around your head. Attaching the elastic completes your DIY Halloween mask, ready to wear and enjoy!
6. Final Touches:
After attaching the elastic to your DIY Halloween mask, it’s time for the final touches. Trim any excess threads and check all the seams to ensure they are secure. If you haven’t already done so, turn the mask inside out through the opening left in the stitching. Gently press the edges with an iron to smooth out any wrinkles and give the mask a neat finish.
If desired, you can add decorative elements like sequins, buttons, or fabric paint to personalize your mask and match your costume theme. Once everything looks good, your DIY Halloween mask is ready to wear and showcase your creativity!
Also Read: The Psychology of Fear: What Makes a Halloween Mask Truly Terrifying?
7. Fit and Adjust:
To ensure your DIY Halloween mask fits perfectly, begin by putting it on and assessing how it sits on your face. Check that it covers your nose and mouth securely without any gaps. Adjust the elastic bands or ties so they fit comfortably around your ears or head, ensuring a snug but not tight fit.
You may need to tweak the pleats or elastic slightly for optimal comfort and coverage. Once adjusted, move around to make sure the mask stays in place and feels comfortable. With these final adjustments, your DIY Halloween mask is ready to complement your costume.
Wrapping up:
Creating your own Halloween mask at home is not just a craft project; it’s a chance to unleash your creativity and personalize your costume. Whether you prefer spooky, whimsical, or unique designs, this DIY endeavor offers endless possibilities. With simple materials like paper, markers, scissors, and elastic, you can craft a mask that truly reflects your style.
If you need help with Halloween costumes, masks, and accessories, visit the Glendale Halloween website. They have lots of creative ideas and options for your party. If you prefer shopping in-store, wait until September when the Best Halloween Store, Glendale Halloween, opens. It’s the best place for all your Halloween needs!